 TabTasker
The fastest way to add a watermark to images is with a client-side browser tool that processes files locally, so your photos never touch a third-party server. Tabtasker's image tools handle both single images and batch jobs in your browser, no account required.
- Single image: Open Tabtasker's image tool, drag in your photo, type your text or upload a transparent PNG logo, position it, set opacity, and export.
- Batch: Drop a folder of images into the tool, configure one watermark template, and export all files as a ZIP.
Open Tabtasker's free image tools and drag your photos in now to get started.
Key Takeaways
Client-side browser tools like Tabtasker are the fastest, most private way to add a watermark to images without uploading files to a third-party server.
| Point | Details |
|---|---|
| Use a transparent PNG logo | A JPEG logo will show a solid box over your photo; always use PNG with an alpha channel. |
| Make watermarking the final step | Watermark last before export to avoid recompression artifacts and quality loss. |
| Save a reusable template | Store your watermark as a PNG overlay to apply the same settings to future batches instantly. |
| Match format to purpose | Export PNG for sharpness and transparency; JPEG for smaller photo files with optional EXIF retention. |
| Tabtasker processes locally | Tabtasker watermarks images in your browser with no upload, no account, and no cost. |
Table of Contents
- How do you add a watermark to images step by step?
- Which watermark type should you use?
- Which file format should you export?
- Does client-side processing actually protect your privacy?
- Is watermarking actually worth it?
- Tabtasker handles watermarking locally, for free
- Sources
How do you add a watermark to images step by step?
Prepare your watermark asset first
Before you upload anything, decide whether you want a text watermark or a logo. Text is the simpler path: you type it directly in the tool. For a logo, you need a PNG file with a transparent background. If your logo is a JPEG, the tool will stamp it as a solid box over your photo, which looks unprofessional. Export your logo from Canva, Illustrator, or any design app as a PNG with an alpha channel before you start.
Single-image workflow
- Upload your image. Drag it into the browser tool or click to browse.
- Add your watermark. Type text or upload your transparent PNG logo.
- Position and scale. Drag the watermark to a corner, center, or custom position. Resize it as a percentage of the image width so it scales proportionally.
- Set opacity and rotation. A subtle mark sits around 20–40% opacity; a visible deterrent goes 60–80%. Rotate slightly for a signature feel.
- Export. Choose PNG for transparency or JPEG for smaller file size. Make watermarking the final step before export to avoid recompression artifacts.
Batch workflow
Upload multiple files or an entire folder, configure your watermark template once (position, opacity, scale, rotation), then apply it to all images and download the results as a ZIP. The key advantage of a client-side tool here is that none of those files ever leave your device, even when you're processing dozens of photos at once.
Quick troubleshooting
- Watermark looks blurry: Your source watermark image is too small. Use a high-resolution PNG, at least as wide as 20% of your largest target image.
- Logo shows a white or colored box: Your logo is not a transparent PNG. Re-export it with an alpha channel.
- Watermark not visible: Opacity is too low, or the watermark color blends with the background. Increase opacity or add a drop shadow or outline.
Pro Tip: Save your finalized watermark as a PNG overlay file and keep it in a dedicated folder. Next time you need to watermark a new batch, you load that file instead of rebuilding settings from scratch.
Which watermark type should you use?
Browser-based watermark tools support four main styles, and each fits a different goal.
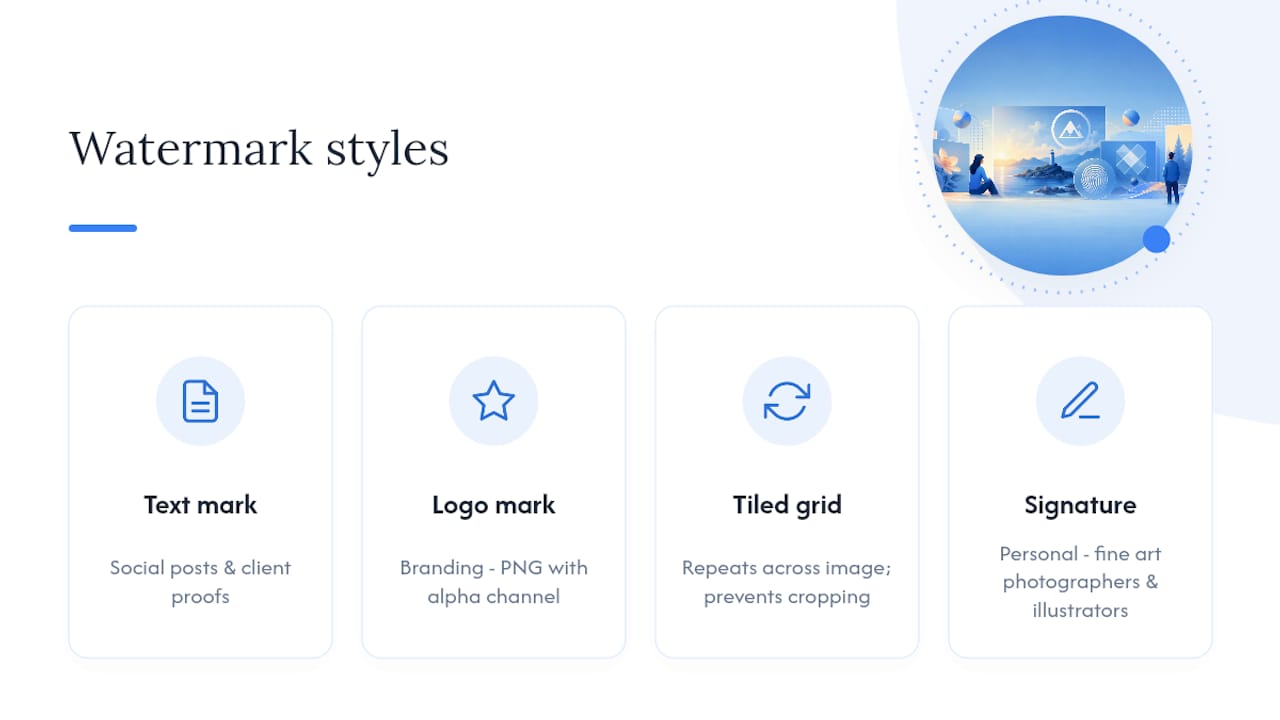
Text watermark is the most common. You type your name, website, or copyright notice directly. It works for social posts, client proofs, and portfolio previews. Keep the font clean and legible; decorative scripts often become unreadable at small sizes.
Logo watermark (PNG with alpha) places your brand mark on the image without a background box. This is the right choice when you want visual branding rather than just a copyright notice. Prepare the logo as a PNG with an alpha channel so the photo shows through cleanly.
Tiled watermark repeats the mark across the entire image in a grid pattern. It makes cropping out a single mark nearly impossible, which is why it works well for client proofs and licensing previews. The trade-off is that it visually dominates the image, so it's not a good fit for social sharing or portfolio display.
Signature or handwritten style uses a script font or an actual scanned signature PNG. It feels personal and works well for fine art photographers and illustrators.
Recommended settings by use case
- Portfolio preview: Bottom-right corner, 25–35% opacity, text or small logo, 8–12% of image width.
- Client proof: Center or tiled, 50–70% opacity, clearly readable.
- Social thumbnail: Bottom-left or bottom-right, 30–40% opacity, small logo.
- Full-frame artwork: Tiled or center, 40–60% opacity, text with drop shadow for contrast.
Percent-based sizing matters because a watermark sized at a fixed pixel count will look enormous on a small image and invisible on a large one. Always size relative to the image dimensions.
Pro Tip: Build two saved templates: one subtle (low opacity, corner placement) for sharing finished work, and one visible deterrent (center, higher opacity) for client proofs. Switch between them depending on where the image is going.
Which file format should you export?
Format choice affects watermark quality, file size, and whether your camera metadata survives.
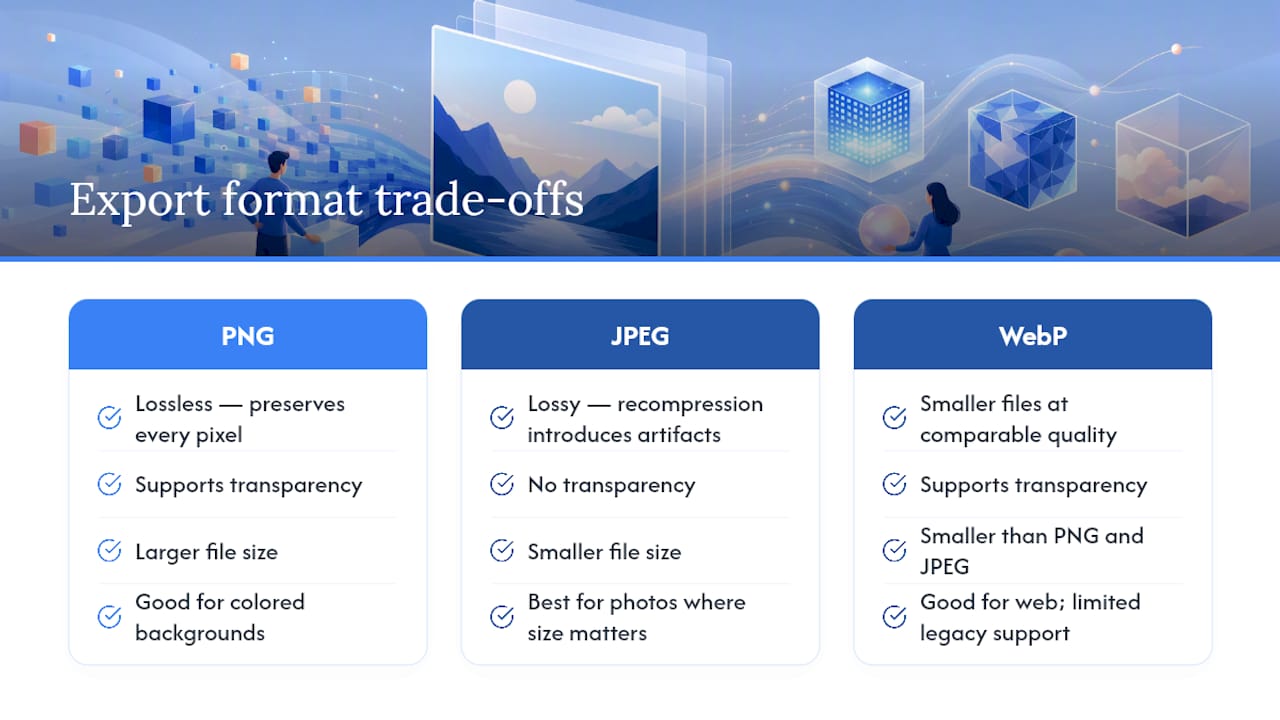
PNG preserves every pixel without compression, so your watermark stays sharp regardless of how detailed it is. PNG also supports transparency, which matters if you're exporting a watermarked image that will be placed on a colored background. The downside is larger file size.
JPEG is better for photographs where file size matters and you don't need transparency. The risk is recompression: every time you save a JPEG, the encoder runs again and introduces artifacts. Watermark as the final step, save once, and don't re-open and re-save the JPEG.
WebP offers smaller file sizes than both PNG and JPEG at comparable quality, and it supports transparency. It's a solid choice for web delivery, though some older software doesn't open it natively.
EXIF metadata and the "Keep EXIF" toggle
EXIF data is the embedded metadata your camera writes into every photo: date, location, lens, exposure settings. Some browser tools preserve EXIF when exporting JPEG if the tool carries a "Keep EXIF" toggle. PNG and WebP exports typically do not carry full EXIF blocks due to browser encoding limits.
If you need to preserve camera data for proofs or a legal chain of custody, look for a tool with an explicit "Keep EXIF" option and export as JPEG. If you want to strip that metadata before sharing, Tabtasker's EXIF removal tool handles that locally with no upload.
Pro Tip: After exporting, open the file at 100% zoom and inspect the watermark edge. If it looks soft or shows color fringing, your source watermark resolution is too low or the export quality setting is too aggressive.
Does client-side processing actually protect your privacy?
The short answer: yes, and the difference matters more than most creators realize.
Client-side processing means the tool runs entirely in your browser. Your images are never uploaded to a server. No third party sees them, stores them, or indexes them. Server-side processing means your files travel to a remote computer, get processed there, and come back. That upload creates a window of exposure.
For most casual watermarking, server-side tools feel fine. But if you're handling unpublished editorial photos, client images, legal documents with embedded images, or anything commercially sensitive, that upload is a real risk. Some server-side services retain files for hours or days. Others use uploaded content to train models or serve ads.
Trust signals worth checking
- "Files never uploaded" or "processed locally" stated explicitly in the tool's documentation or privacy policy.
- No account required to use the tool.
- An open-source codebase or a published, auditable privacy policy.
- A "Keep EXIF" toggle that gives you control over metadata, rather than stripping or retaining it silently.
Tabtasker checks all of these. Every image operation runs in your browser. There's no signup, no upload, and no server receiving your files.
When might server-side be acceptable? Heavy batch jobs involving thousands of high-resolution files can exceed what a browser tab handles comfortably. If you go that route, use a throwaway upload session, strip EXIF after watermarking, and delete the files from the service immediately after download.
Is watermarking actually worth it?
Visible watermarks are a deterrent and a branding tool, not a lock. A determined person with basic editing skills or an AI inpainting tool can remove or crop a visible watermark. That's the honest answer, and it's worth knowing before you rely on watermarking as your only protection strategy.
That said, most unauthorized image use isn't sophisticated. A visible copyright notice stops casual copying on social media, signals ownership to anyone who finds the image through search, and keeps your name attached to your work as it circulates.
Comparing protection methods
Steganography deserves a closer look as an alternative. LSB (Least Significant Bit) steganography hides text invisibly inside image pixels, leaving no visible mark. The catch: it requires a lossless output format (PNG or BMP) and will be destroyed if the image is recompressed as JPEG or uploaded to a platform that re-encodes images. Tools like Pixel Locker run this entirely in the browser and warn explicitly that LSB is not cryptography. Some tools, like StegoToolkit, add optional AES-256 encryption and a capacity indicator, and recommend always downloading a PNG to preserve the hidden data.
The practical recommendation: use a visible watermark for anything shared publicly, combine it with a low-res preview for client proofs, and consider LSB steganography as a supplementary hidden marker for high-value work where you need a provable ownership trail.
Tabtasker handles watermarking locally, for free
Privacy-conscious creators who want to watermark photos without uploading them to a stranger's server have a clear option: Tabtasker's browser-based image tools process everything on your device, with no account, no upload, and no cost.

The practical benefits are concrete. You get client-side processing (files stay local), PNG transparency support for logo watermarks, batch export for multiple images, and a no-signup workflow you can use right now. For creators who also need to clean up images before watermarking, the photo cleanup workflow combines background removal, upscaling, and PNG export in one step.
Try Tabtasker's free image tools and watermark your first image in under two minutes.
A note on realistic expectations
Privacy-first browser tools are the right default for most creators, and Tabtasker fits that need well. But watermarks are deterrents, not guarantees. The smarter approach is to combine visible watermarking with safe sharing habits: share lower-resolution versions publicly, keep full-resolution originals off public platforms, and use EXIF copyright fields or steganography as a secondary ownership record. No single tool closes every gap, but starting with one that doesn't upload your files is a reasonable first step.
Sources
- AvinashWalton/PixelLocker
- Hide Text Inside Image - Image Steganography
- Hide Text in Image Online — Free Steganography Encoder | No Upload
- Free Watermark Photo Tool: Text or Logo, In Your Browser | TimeStamp Camera