 TabTasker
The three fastest ways to batch resize photos are Microsoft PowerToys Image Resizer (Windows, right-click, zero friction), a local browser tool like Tabtasker (no install, no upload, works on any OS), and Adobe Lightroom's export presets (professional control, color management, metadata handling). For most people who want speed without handing files to a server, Tabtasker's in-browser processing is the recommended starting point. If you're on Windows and already have PowerToys, that's the quickest path. Lightroom is the right call when color profiles and metadata matter.
Pick your path in three steps:
- Choose your method: browser tool for privacy and simplicity, PowerToys for Windows speed, Lightroom for professional output
- Consolidate your photos into a single folder before you start
- Run the batch operation, then verify a sample image before using the full output
Key Takeaways
The fastest and most private way to batch resize photos is a local browser tool that processes files on your device, with PowerToys for Windows-native speed and Lightroom for professional output control.
| Point | Details |
|---|---|
| Fastest Windows method | PowerToys Image Resizer adds right-click batch resizing to File Explorer with no extra app window. |
| Best privacy option | Tabtasker processes images client-side in the browser, so files never leave your device. |
| Professional control | Adobe Lightroom export presets preserve color profiles, metadata, and the "Don't Enlarge" setting. |
| Large-scale automation | ImageMagick or PowerToys CLI handles thousands of images; test on a sample first and run overnight. |
| Always verify output | Check a sample image for resolution, sharpness, and file size before using the full batch. |
Table of Contents
- How do the main batch resize approaches compare?
- How to batch resize on Windows using PowerToys Image Resizer
- How to use a free online bulk image resizer
- How to bulk resize in Adobe Lightroom using export presets
- Advanced: scripting batch resizes with ImageMagick and PowerToys CLI
- What settings and presets should you use for common outputs?
- Why Tabtasker's in-browser resizer protects your files
- Which batch resize method should you use right now?
- When I reach for each method
- Tabtasker: resize photos privately, right in your browser
- Sources
How do the main batch resize approaches compare?
Every method for resizing images in batches falls into one of four categories: browser-based tools, OS-integrated shell extensions, desktop apps, and command-line scripts. Each has a distinct profile.
Browser-based tools run in your browser tab. Some upload your files to a server; others process everything locally using WebAssembly or Canvas, so images never leave your device. Local tools can handle hundreds of files, limited only by your device's RAM and CPU.
OS-integrated extensions like PowerToys Image Resizer embed directly into Windows File Explorer. Right-click a selection of images and resize them in seconds. No separate app window, no export dialog.
Desktop apps such as FastStone Image Resizer offer fast local batch processing with format conversion, renaming, and basic edits included. They're lightweight and work entirely offline.
Command-line scripts using ImageMagick or the PowerToys CLI suit repeatable, automated jobs on thousands of images. Steeper learning curve, but unmatched for scripted workflows.
| Approach | Best for | Platform | Privacy | Cost | Speed & batch limits |
|---|---|---|---|---|---|
| Local browser tool | Casual, privacy-focused users | Any (browser) | Local, no upload | Free | Fast; hundreds of files, device-limited |
| OS shell extension | Quick Windows jobs | Windows only | Local/offline | Free | Very fast; large batches |
| Desktop app | Offline power users | Windows/macOS | Local/offline | Free or paid | Fast; large batches |
| Command-line script | Automated, scripted jobs | Cross-platform | Local/offline | Free | Fastest at scale; unlimited |
| Hosted online service | Convenience, any device | Any (browser) | Server-side upload | Free/freemium | Moderate; file-size limits apply |
How to batch resize on Windows using PowerToys Image Resizer
PowerToys Image Resizer is a Windows shell extension that adds a "Resize pictures" option directly to File Explorer's right-click menu. It supports pixel, percentage, inch, and centimeter units, and offers Fill, Fit, and Stretch modes for controlling how images handle aspect ratio changes.
- Install PowerToys. Download from the Microsoft Store or the GitHub releases page and run the installer.
- Enable Image Resizer. Open PowerToys Settings, navigate to Image Resizer, and toggle it on.
- Select your images. In File Explorer, select all photos you want to resize (Ctrl+A for all, or Shift/Ctrl+click for a subset).
- Right-click and choose "Resize pictures." The Image Resizer dialog opens.
- Pick a preset or enter custom dimensions. Built-in presets include Small, Medium, Large, and Phone sizes. For custom sizes, enter your target width and height and choose your unit.
- Choose your fit mode.
- Fill scales the image to fill the target dimensions, cropping if needed.
- Fit scales the image to fit within the target box while preserving the full image, adding no padding.
- Stretch forces the image to exactly match the target dimensions, ignoring aspect ratio.
- Set the output option. Choose "Make copies" to save resized images alongside originals, or "Resize the originals" if you're certain you don't need them.
- Click Resize. Done.
Pro Tip: Enable "Only shrink files, never enlarge" in the Image Resizer settings. This prevents PowerToys from upscaling small images and degrading quality. Also check "Ignore the orientation of pictures" if your batch mixes portrait and landscape shots.
How to use a free online bulk image resizer
Browser-based bulk resizers are the fastest zero-install option. The key question to ask before you drop files into any online tool: does it process files on your device or upload them to a server?
- Consolidate your files. Move all photos into one folder. This saves time and prevents missed files.
- Drag and drop your images into the upload zone, or use the file picker.
- Choose your target dimensions or preset. Most tools let you set a fixed pixel size, a percentage of the original, or a maximum width/height while preserving aspect ratio.
- Pick your fit behavior. Fit keeps the full image within your target box. Fill crops to fill the box exactly. Stretch forces exact dimensions.
- Set output format and quality. JPEG at 80–85% quality is a solid default for web use. WebP produces smaller files at comparable visual quality.
- Process and download. Most browser-based tools package results as a ZIP file. Browser-based tools often skip very large individual files to keep the page responsive, so check the output count matches your input.
Before you upload anything, check whether the tool processes files locally or sends them to a server. A tool that runs client-side using WebAssembly or Canvas will not show a progress bar tied to network speed, and its privacy policy will state that no files are transmitted. If you see a network upload indicator, your files are leaving your device. For sensitive photos, that distinction matters.
Troubleshooting common issues:
- Unsupported format error: Convert HEIC or RAW files to JPEG or PNG first using Tabtasker's image converter.
- Tool skips large files: Split the batch into smaller groups, or switch to a desktop app or CLI tool.
- Output looks blurry: You may have upscaled small images. Enable "shrink only" or "don't enlarge" if the tool offers it.
How to bulk resize in Adobe Lightroom using export presets
Adobe Lightroom's export workflow is the professional standard for batch resizing when color management, metadata control, and output consistency matter. Export presets let you define every setting once and apply it to hundreds of images in a single operation.
- Import your photos into Lightroom Classic and let the catalog finish building previews.
- Select all photos you want to resize. Use Ctrl+A in the Library module grid view, or Shift+click a range.
- Open the Export dialog. Go to File > Export (Shift+Ctrl+E on Windows, Shift+Cmd+E on Mac).
- Configure image sizing. Under "Image Sizing," check "Resize to Fit" and choose your method: Long Edge, Short Edge, Width & Height, or Megapixels. Enter your target value.
- Enable "Don't Enlarge." This prevents Lightroom from upscaling images smaller than your target dimension, which would degrade quality.
- Set color space and quality. Choose sRGB for web output. For JPEG, a quality setting of 80–90 balances file size and sharpness. For maximum fidelity, use 100 and compress afterward.
- Choose metadata handling. Strip all metadata for public web use, or preserve copyright and contact info for client delivery.
- Save as a preset (click "Add" in the left panel) so you can apply these exact settings to future batches in one click.
- Click Export. Lightroom processes all selected images and saves them to your chosen folder.
Professional workflows favor Lightroom export presets because they preserve color profiles, metadata choices, and precise sampling behavior, whereas ad-hoc browser tools prioritize speed and simplicity.
Advanced: scripting batch resizes with ImageMagick and PowerToys CLI
For repeatable jobs on thousands of images, a command-line approach beats any GUI. Two tools dominate: ImageMagick's mogrify command and the PowerToys Image Resizer CLI.
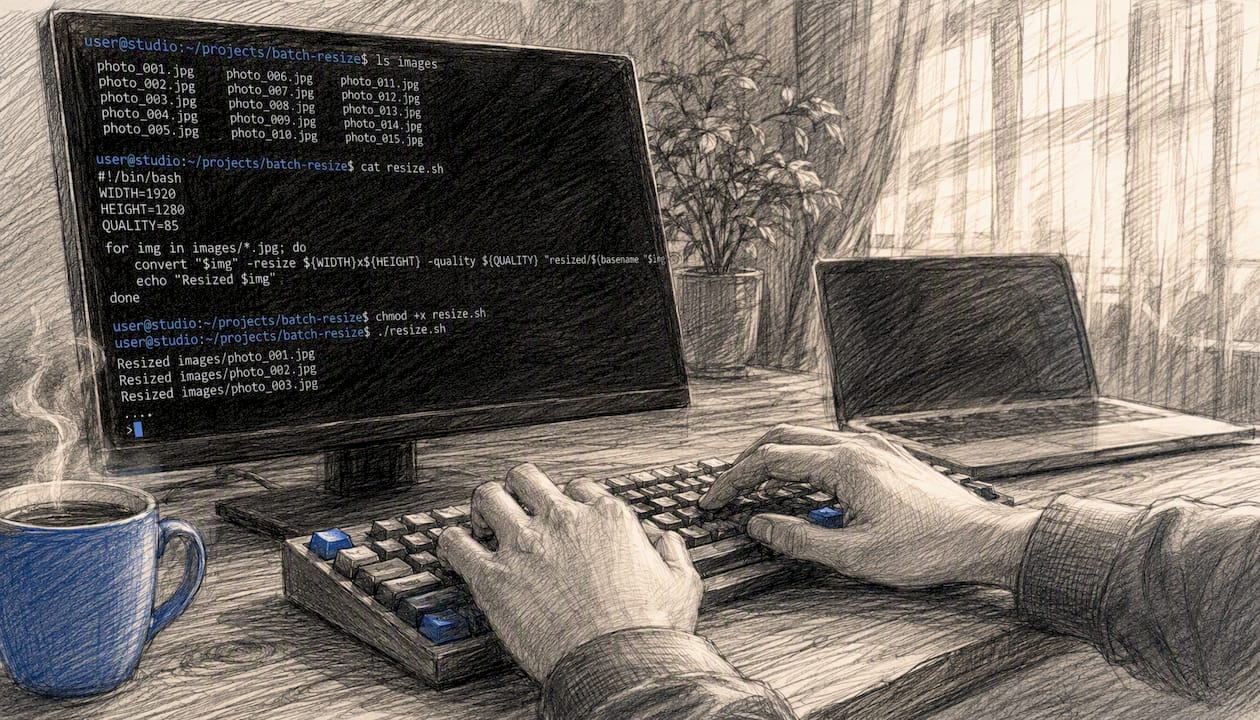
ImageMagick is cross-platform and free. This command resizes all JPEGs in a folder to a maximum of 1200px on the long edge, preserving aspect ratio, and saves them to an output/ subfolder:
magick mogrify -path output/ -resize 1200x1200> *.jpg
The > after the dimensions tells ImageMagick to shrink only, never enlarge.
PowerToys Image Resizer CLI gives you Windows-native scripting with flags you already know from the GUI. A basic example:
PowerToys.ImageResizerCLI.exe -i "C:\Photos\*.jpg" -d "C:\Resized" --width 1200 --unit pixel --fit fit --shrink-only
The documented CLI flags include --height, --unit (pixel, percent, inch, cm), --fit, --shrink-only, --replace, and --remove-metadata.
For large batches, always run your command on a sample folder of 5–10 images first. Record how long those take, then multiply to estimate total processing time. Estimate processing duration by timing a small sample batch and scaling accordingly. Plan accordingly, and schedule the full run during off-hours.
Pro Tip: Add --remove-metadata to strip EXIF data from output files before publishing to the web. This removes GPS coordinates, camera model, and other metadata that you may not want public.
What settings and presets should you use for common outputs?
Choosing the right dimensions upfront saves you from re-running the batch. Here are recommended settings for the most common targets:
- Email attachments: Around 1200px on the long edge with JPEG quality set to a reasonable web-appropriate level helps maintain manageable file sizes.
- Website hero images: Use full HD resolution (1920×1080px) with JPEG or WebP at moderate quality settings for good web performance and smaller files from WebP.
- Instagram post: Typical Instagram post resolutions include square and portrait aspect ratios, saved in JPEG or PNG with sRGB color space.
- Instagram Story / Reels: Instagram Story and Reels typically use portrait mode heights; keep important content within safe margins to avoid cropping.
- YouTube thumbnail: 1280×720px, JPEG, under 2 MB.
- E-commerce product (Amazon/Shopify): E-commerce product images often use large square dimensions to allow zooming and good display, saved in JPEG with appropriate background.
Pixels vs. percentage: Use pixel dimensions when you have a fixed target (a platform spec). Use percentage when you want to uniformly reduce a batch without knowing exact output sizes, such as halving a folder of mixed-resolution photos for email.
Fit vs. Fill: Fit preserves the entire image within the target box, which may leave empty space on two sides. Fill crops to fill the box completely. For product photos with white backgrounds, Fill is usually fine. For portraits or scenes where cropping could cut off important content, Fit is safer.
JPEG quality vs. file size: Quality 60 is noticeably degraded at full screen. Quality 80 is the practical sweet spot for web use. Quality 90+ is for print or archival output where file size is secondary. WebP at equivalent settings produces smaller files and is supported by all modern browsers.
Why Tabtasker's in-browser resizer protects your files
Tabtasker processes images entirely client-side. Your files never leave your device, no account is required, and there's no watermark on the output. That's not a marketing claim; it's how browser-based Canvas and WebAssembly processing works. The tool runs in your browser tab, and the only thing that moves is the download you trigger yourself.
If you're handling client photos, legal documents with embedded images, or anything you wouldn't email to a stranger, the question of where your files go during processing isn't paranoia. It's due diligence. Many "free" online tools process files on their servers, which means your images pass through infrastructure you don't control. Tabtasker's local processing removes that variable entirely.
How to use Tabtasker's resize tool:
- Open Tabtasker's image resizer in any browser tab.
- Drag and drop your photos into the tool, or click to browse.
- Choose your target dimensions or select a preset (web, social, email).
- Pick your fit mode and output format.
- Click process. Download the ZIP or save individual files.
Pro Tip: Tabtasker's tools chain together. After resizing, run your images through the background remover or the photo cleanup workflow that combines background removal, upscaling, and PNG conversion, all without leaving the browser.
Which batch resize method should you use right now?
- One-off job, any device, privacy matters: Use Tabtasker's in-browser resizer. No install, no upload, works on Windows, Mac, and Chromebook.
- Quick Windows job, PowerToys already installed: Right-click resize in File Explorer. Fastest path for Windows users with an existing PowerToys setup.
- Professional photo shoot, color management required: Use Adobe Lightroom export presets. Set "Don't Enlarge," choose sRGB, and save the preset for next time.
- Hundreds of files, privacy-sensitive, no desktop app: Browser tools with local processing handle batches of several hundred images comfortably, subject to your device's RAM.
- Thousands of images, scripted or nightly job: Use ImageMagick
mogrifyor the PowerToys CLI. Schedule the script to run overnight and verify a sample in the morning. - Offline, Windows only, lightweight app preferred: FastStone Image Resizer handles batch resizing, renaming, and format conversion without an internet connection.
When I reach for each method
The honest answer is that the "best" tool depends on what's already open on your screen. For quick sharing, a browser tool that processes locally is the path of least resistance. No installer, no export dialog, no waiting for a desktop app to launch. Tabtasker fits that slot well, particularly when the files are sensitive.

For client delivery, Lightroom's export presets are worth the setup time. Defining the preset once means every future batch for that client takes about 30 seconds of actual work. The color profile and metadata settings are locked in, which matters when you're delivering to a print lab or a brand with specific requirements.
For bulk catalog jobs, the command line wins. Running mogrify on 3,000 product images while you sleep is a different category of efficiency than any GUI tool.
Three rules that apply regardless of method: always back up originals before running any batch operation, test your settings on a sample of 5–10 images before processing the full set, and always enable "don't enlarge" or "shrink only" to avoid upscaling artifacts.
Tabtasker: resize photos privately, right in your browser
Most people don't need to install software or hand their photos to a server to resize a batch of images. Tabtasker gives you a full image resizing workflow, free, in your browser, with no account and no upload required. Your files stay on your device from start to finish.
Resize, compress, convert, and remove backgrounds from multiple photos in one session using Tabtasker's privacy-first image tools. When you're done, share the results securely with Tabtasker's browser-to-browser file sharing. No third-party servers, no file size anxiety, no subscription. Open the tool and start resizing now.