 TabTasker
Converting a PDF to a JPG means transforming each page of a PDF document, or the images embedded within it, into a JPEG format file that works across websites, presentations, and editing software. The process is called PDF rasterization when applied to full pages, and image extraction when targeting only embedded graphics. Tools like Adobe Acrobat, ImageMagick, and online converters such as Canva each handle this differently, and choosing the wrong one for your goal is the most common source of frustration. This guide covers every practical method, from free browser tools to command-line utilities, so you can get sharp, usable results the first time.
What tools can you use to convert a PDF to JPG?
The right tool depends on how much control you need over the output. Free online services like Canva and Adobe’s online converter handle most everyday conversions with a few clicks and no software to install. They work well for single files or small batches where speed matters more than precision.
Desktop software like Adobe Acrobat Pro sits in the middle tier. It exports PDF pages or embedded images to JPEG, TIFF, or PNG with quality options you can adjust before saving. This makes it the standard choice for professionals who need consistent, repeatable results across many documents.

Command-line tools like ImageMagick and pdftoppm are the most powerful option. They support batch processing, precise DPI control, and scripted workflows. The trade-off is a steeper learning curve that most casual users will not want to climb.
Comparison of conversion methods
| Method | Ease of use | Quality control | Batch support | Cost |
|---|---|---|---|---|
| Online converters (Canva, Adobe online) | Very easy | Limited | Basic | Free |
| Adobe Acrobat Pro | Moderate | Good | Yes | Paid |
| ImageMagick (command line) | Advanced | Excellent | Yes | Free |
| pdftoppm (command line) | Advanced | Excellent | Yes | Free |
| Windows Snipping Tool | Very easy | Poor | No | Free |
One detail most guides skip: page conversion and image extraction are fundamentally different tasks. Converting a page renders the entire page as a flat image, including text, borders, and backgrounds. Extracting embedded images pulls only the original image objects from the PDF file, without re-rendering anything. Knowing which one you actually need will save you a lot of rework.
-
Online converters are best for quick, one-off conversions where privacy is not a concern
-
Adobe Acrobat Pro suits professionals who need reliable quality and page selection
-
ImageMagick is ideal for developers or power users running batch jobs
-
pdftoppm excels at rendering PDF pages to images with fine-grained DPI settings
-
Snipping Tool works as a last resort for a single page at screen resolution
How to convert a PDF to JPG step by step
Using an online converter
-
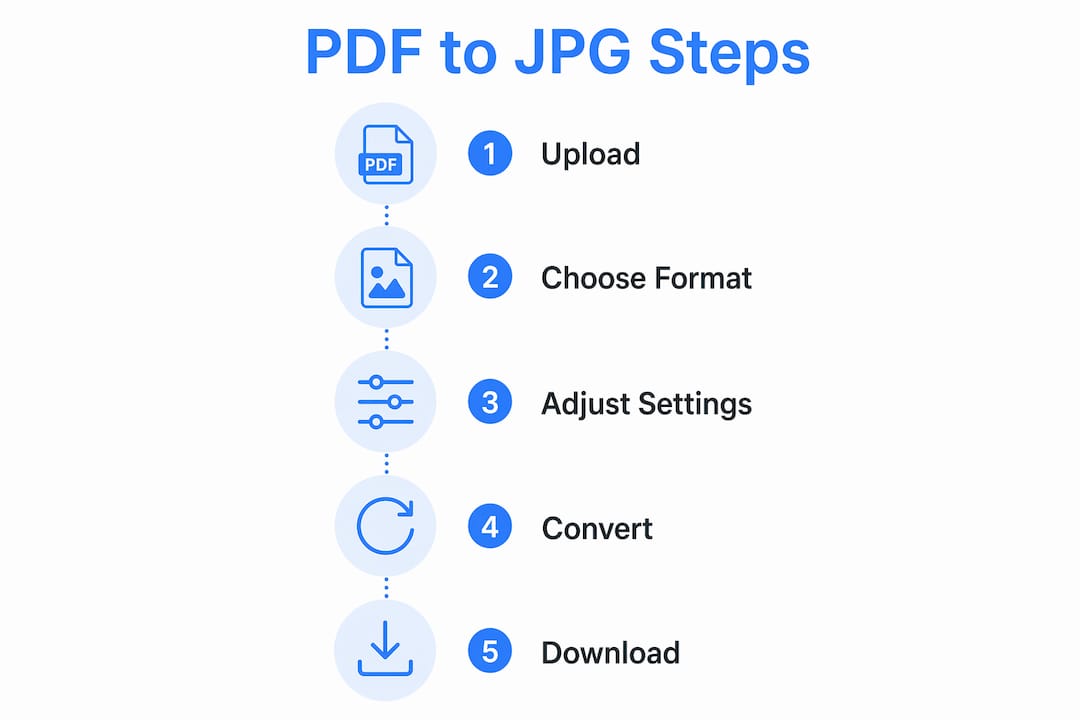
Open Canva, Adobe’s online PDF converter, or a similar free service in your browser.
-
Upload your PDF file using the upload button or drag-and-drop area.
-
Select JPG as the output format from the format menu.
-
Choose which pages to convert if the tool offers page selection.
-
Click Convert or Export and download the resulting JPG files.
The whole process takes under two minutes for most files. The downside is that your file travels to a third-party server. If you are working with sensitive documents, that is worth pausing on before you click upload. Understanding what happens to your PDF online can help you make a more informed choice.
Using Adobe Acrobat Pro
-
Open your PDF in Adobe Acrobat Pro.
-
Go to Tools and select Export PDF.
-
Choose Image as the export format, then select JPEG.
-
Click the gear icon to adjust quality settings if needed.
-
Select whether to export all pages or a specific range.
-
Click Export and choose a save location.
Adobe Acrobat Pro also lets you extract only the embedded images from a document, which is a separate option under Tools > Export PDF > Image. This is the right path when you want the original photos from a PDF brochure, not screenshots of each page.
Using ImageMagick on the command line
For users comfortable with a terminal, ImageMagick gives you the most control. The critical rule is to set the density flag before specifying the input file, not after. The correct syntax looks like this:
convert -density 300 input.pdf -quality 90 output-300d.jpg
This command renders every page at 300 DPI and saves them as sequentially numbered JPG files with 90% compression quality. Reversing the order of the flags produces blurry output because ImageMagick defaults to 72 DPI when density is not declared upfront.
**Pro Tip:**For batch conversions across multiple PDFs, wrap the ImageMagick command in a simple shell loop. This processes an entire folder of files automatically and names each output set by its source filename, saving hours of manual work.
How does image quality change during conversion?
Resolution, measured in dots per inch (DPI), is the single biggest factor in JPG quality after a PDF conversion. Setting DPI to 300 is the standard recommendation for professional sharpness, whether you are preparing images for print or high-resolution web display. At the default 72 DPI that many tools use, text and fine lines become visibly pixelated.
JPEG compression adds a second layer of quality decisions. JPEG uses lossy compression, meaning it discards some image data to reduce file size. A quality setting of 90 to 95 out of 100 preserves most visible detail while keeping file sizes manageable. Dropping below 70 introduces noticeable artifacts, especially around text edges.
A two-stage workflow using pdftoppm and ImageMagick gives you the best of both worlds. First, render the PDF page to a high-resolution PNG at 300 DPI using pdftoppm. Then convert that PNG to JPG using ImageMagick with your chosen compression setting. This approach separates the rendering step from the compression step, giving you more control over the final result.
Pro Tip: If your final JPG needs to be a specific pixel width, render at 300 DPI first and then resize down. Rendering at high DPI then downsampling preserves text sharpness far better than rendering at the target resolution directly.
The distinction between converting full pages and extracting embedded images matters for quality too. Adobe Acrobat Pro and the pdfimages tool extract embedded images without re-rendering them, which means zero quality loss from rasterization. The command `pdfimages -all` pulls every embedded image in its original format, making it the best option when the PDF contains photographs you want at their original resolution.
Common problems when converting PDF files to images
Most quality problems trace back to one of three mistakes: wrong DPI, wrong method, or wrong tool for the job.
- Pixelated or blurry output almost always means the conversion ran at 72 DPI. Fix it by explicitly setting 300 DPI in your tool of choice before converting.
- Wrong content in the output often means you ran a page conversion when you needed image extraction, or vice versa. A page render includes all page elements; image extraction outputs only embedded objects without surrounding page content.
- Bloated file sizes result from saving at maximum JPEG quality when a lower setting would look identical on screen. Quality 85 to 90 is usually the practical ceiling for web use.
- Missing pages in multi-page PDFs happen when a tool defaults to converting only the first page. Check the page range settings before you start.
When a quick, low-tech solution is all you need, the Windows Snipping Tool or a Mac screenshot can capture a PDF page area and save it as a JPG. The quality is limited by your screen resolution, so treat this as a convenience option rather than a production method.
For multi-page documents, ImageMagick’s %03d filename pattern automatically numbers each output file. This keeps your folder organized and makes it easy to identify which JPG corresponds to which PDF page.
Which PDF to JPG converter is right for you?
The best tool is the one that matches your actual use case, not the one with the most features.
| User type | Best tool | Key reason |
|---|---|---|
| Casual user, one-off conversion | Canva or Adobe online | Fast, free, no installation |
| Professional with quality needs | Adobe Acrobat Pro | Reliable export with quality options |
| Developer or power user | ImageMagick or pdftoppm | Full control, batch processing, scriptable |
| Privacy-conscious user | Offline tool (Tabtasker) | Files never leave your device |
| Quick screen capture | Windows Snipping Tool | No setup, instant result |
If you are converting PDFs regularly, the free online route starts to show its limits quickly. File size caps, page limits, and the fact that your documents pass through someone else’s server are real constraints. For anyone handling contracts, medical records, or proprietary designs, an offline tool is not optional. It is the only responsible choice.
For those who want to go the other direction and convert JPG to PDF free, the same logic applies: local processing keeps your files private and removes the upload bottleneck entirely.
My honest read on picking the right conversion method
By Vehicularis
After working with PDF workflows across publishing, legal, and marketing contexts, the pattern I keep seeing is this: people reach for the most convenient tool without asking what the output is actually for. That mismatch is where quality problems start.
If you are converting a PDF page to drop into a PowerPoint slide, 150 DPI is probably fine and a free online tool will do the job. If you are preparing product images for an e-commerce site from a supplier’s PDF catalog, you need 300 DPI and lossless extraction, which means Adobe Acrobat Pro or pdfimages, not a browser tab.
The part that genuinely concerns me is how casually people upload sensitive PDFs to free online converters. The phrase “if you’re not paying for the product, you might be the product” is overused, but it applies here. Many free conversion services retain uploaded files for a period after processing. That is fine for a recipe PDF. It is not fine for a signed contract or a medical form.
My practical advice: match the tool to the sensitivity of the document first, then optimize for quality. For anything confidential, use a local tool that never touches a server. For everything else, pick the method that gives you the DPI and compression control your output actually requires. Spending five minutes on that decision saves you from re-doing the conversion three times.
— Vehicularis
Convert and edit your JPGs privately with Tabtasker
Tabtasker’s Image Editor workspace gives you a full suite of image tools that run entirely in your browser, with no uploads and no account required. Your files stay on your device from start to finish, which means no server logs, no data retention, and no exposure to third-party privacy policies. After converting your PDF pages to JPGs, you can crop, resize, adjust quality, or remove the background without switching tools or uploading your files anywhere. For anyone who has grown skeptical of what “free” online converters actually cost in terms of privacy, Tabtasker is worth trying.
FAQ
How do you convert a PDF to a JPG for free?
Upload your PDF to a free online converter like Canva or Adobe’s online tool, select JPG as the output format, and download the result. For a private, offline option, Tabtasker’s image tools process files directly in your browser without any uploads.
What DPI should I use when converting a PDF to JPG?
300 DPI is the standard for professional quality, whether for print or high-resolution web use. At the default 72 DPI used by many tools, text and fine lines appear pixelated in the output.
What is the difference between converting a PDF page and extracting embedded images?
Converting a page renders the entire page as a flat image, including text and layout. Extracting embedded images pulls only the original image objects from the PDF without re-rendering, which preserves their original quality.
Can I convert a multi-page PDF to separate JPG files?
Yes. Tools like ImageMagick, Adobe Acrobat Pro, and most online converters support multi-page PDFs and save each page as a separate numbered JPG file. ImageMagick uses the `%03d` pattern in the output filename to number files automatically.
Is it safe to upload a PDF to a free online converter?
For non-sensitive documents, free online converters are convenient and generally safe. For confidential files such as contracts, medical records, or financial documents, use an offline tool that keeps your files local to avoid any risk of data retention by third-party servers.